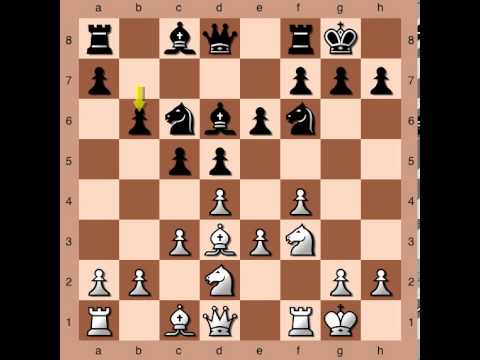
Learn how to play chess the most popular game in the world! Learning the rules is easy, set up the board, discover how the pieces move, and learn some basic strategies.


Sunday, September 23, 2018

Chess for Newbies : Symmetric Benoni

Image result for Symmetric Benoni chess

The symmetric Benoni structure is one of my favourites, and it is one of the structures that motivated me to write this book. It often arises from Benoni variations in which White recaptures exd5 instead of cxd5, which yields the more typical Benoni position we studied in the previous chapter. Unlike the previous chapter in which Black had clear plans to gain counterplay, now Black faces a dilemma of what to do. Black can often develop his pieces to obtain what seems to be an equal position, but White usually retains a small spatial advantage. This advantage increases if White manages to expand on the kingside, restricting Black's pieces substantially. Black's play can be rather difficult, and great precision is required to avoid being asphyxiated. A main theme in this vatiation is whether Black manages to trade off some minor pieces to decrease his space problem. In addition, the control of the e4-squate is often an important factor to determine whether Black can equalize or not. Let's discuss specific plans:
White's plans  :
1. Expand on the kingside with f2-f4, g2-g4 and potentially create an attack.
2. Attack the vulnerable d6-pawn with a bishop on the h2-b8 diagonal and a knight on e4.
3. Sometimes White will also play b2-b4, but there is really not much to be gained on the queenside. In fact, opening the queenside could give Black chances for much-needed counter play.
Black's plans :
1. Control the e4-squate and occupy it with a knight.
2. Break on the queenside with ... b7-b5, and obtain counterplay against a potentially weak d5-pawn.
3. Trade off minor pieces to decrease the space problem. Sometimes this can be achieved with the sequence ... b6, .. ..f5 and ... e4 which can also create pressure against the b2-pawn.
White's kingside expansion is the most important plan in the position, and Black's plans are aimed at fighting against it. After White plays f2-f4, Black should typically reply with ... f7-f5 to claim some space before it is too late. Later he should be ready to prevent g2-g4, as White could gain a decisive spatial advantage with this expansion. Black's Plan 2 is probably the most active and interesting reaction, and should be considered in a variety of positions even in the form of a pawn sacrifice. The virtue of this sacrifice is that it opens many lines, and may turn White's kingside expansion into a weakening.
The first game in this chapter is an older example which illustrates White's Plan 1 being executed to perfection. Then, the second game is a more modern version where Black finds a better defensive plan, though still remaining passive. The third game illustrates White's Plan 2, while White's Plan 3 is not really covered simply because it is not as important or useful. Then, the last three games in the chapter illustrate Black's Plans 1 -3 in that order.  
Share:

Chess for Newbies : Asymmetric Benoni


Image result for Asymmetric Benoni chess

The Asymmetric Benoni structure, usually called simply the Benoni, is a very tactical pawn structure that requires great precision from both sides. It typically arises from various Benoni openings, though it also appears in many variations of the Ruy Lopez. The main theme in this structure is the fight between pawn majorities. White has a pawn majority in the center while Black has his majority on the queen side. The side that manages to push his majority will generally achieve a superior position, and all plans gravitate around this fact. White enjoys some spatial advantage, therefore trading pieces will often work against him. In fact, as pieces are traded, Black's position often becomes better. The reason is that Black has the potential for creating a remote passed pawn, which can be very strong in an endgame. In contrast, White's chances are at their best in a middlegame with many pieces still on the board, since the central majority often provides him with good chances for a mating attack. Now let's spell out specific plans for each side.
White's plans :
1. Break in the centre with e4-e5, either to obtain an attack, or to create a central passed pawn.
2. Break with e4-e5 followed by f4-f5 in order to obtain a kingside attack.
3. Break with f4-f5 followed by a kingside attack, mainly down the f-file. 4. Prevent Black'squeenside expansion by playing b2-b4, blocking the advance ... b5-b4.
Black's plans :
1. Advance the queenside majority with ... b7-b5, ... c5-c4, ... b5-b4, etc. Create a passed pawn if possible.
2. Pressure down the e-file, preventing White from advancing his central majority.
3. Create king side counterplay based on ... h7-h5-h4, mainly when White has placed a knight on g3.
4. Break White's centre with ... f7-f5. This break can work wonderfully after White has played f3-f4, since the d5-pawn loses protection.
As we will see later in this chapter, Black's light squared bishop is often the least helpful piece, as it does not contribute to the advance of the majority, and it is often blocked by the queen side pawns on a6-b5-c4. The first three games in this chapter illustrate White's Plans l, 2 and 3 respectively. Then we use a short fragment to discuss Black's piece arrangement, and at the same time present White's Plan 4. Then the last two examples display a combination of Black's Plans 1 and 4.
Share:

Chess for Newbies : The Maroczy Bind

Image result for The Maroczy

The Maroczy structure we study in this chapter bears a great similarity with the Hedgehog from the previous chapter. In fact, some sources may call that chapter's structure Maroczy as well, simply because White has placed his pawns on c4 and e4. In this book, I decided to give a separate treatment to these two structures because I consider they are sufficiently different. The difference is in how Black develops his dark-squared bishop. In the Hedgehog chapter, Black's bishop was always developed on e7, hence ... e7-e6 had been played. Here instead we study rhose positions where Black fianchettoes his bishop on g7. Most importantly, Black's e-pawn often remains on e7. This fact has the following consequences:
I. White can place a knight on d5, which can lead to a major structural transformation if Black trades the knight.
2. The central break ... d6-d5 is no longer a main theme here.
3. Black can trade pieces without worrying about the d6-pawn becoming vulnerable, as happened in the game Eljanov - Jakovenko from the previous chapter. The structure we study in this chapter is typical of the Accelerated Dragon, but it can also arise as a transposition from the English Opening or some lines that start out as a King's Indian. It can also occur with reversed colours if White plays the English Opening, allowing Black to reply ... d5 and later ... c5. Most examples in this chapter will come from the Accelerated Dragon because it is the most common source of Maroczy games. Nevertheless the ideas transfer easily to the other lines.-The main theme of the Maroczy is White's spatial advantage, which means Black will often attempt to trade pieces and later fight on in the endgame phase.
White's plans :
1. Gain space with a queenside expansion, place a knight on d5, and/or expand on the kingside with f2-f4.
2. After f2-f4 has been played, place rooks on the central files and break with either e4-e5 or f4-f5.
3. Place a knight on d5 and wait for Black to capture on d5. Once this happens, White can transform the structure favourably with either exd5 or cxd5. Each of these replies is studied at the beginning of this chapter.
Black's plans :
1. Trade pieces to alleviate the space problem.
2. Break on the queenside with ... b6-b5 and after c4xb5 and ... a6xb5 then apply pressure along the a-file.
3. Break on the kingside with ... f7-f5 and later create an attack against White's king.
4. Pressure White's queenside pawns with ... b6-b4, and when White plays b2-b3, then ... a7-a5-a4xb3.
5. On rare occasions play ... e7-e6 and later ... d6-d5, though this plan is more typical of the Hedgehog. Out of the plans mentioned above, it should be said that White's first three plans are more or less equally common, while Black's first three plans are the most common for him. Black's fifth plan is almost never carried out in games which originate from the Accelerated Dragon variation. 
Share:

Saturday, September 22, 2018

The Hedgehog

Image result for The Hedgehog chess


The hedgehog structure is characterized by Black's pawns on a6-b6-d6-e6, covering some central squares and preventing White's forces from approaching, like a real hedgehog does! Advancing several adjacent pawns to the 3rd rank would generally be a bad decision. For example, moving kingside pawns to h6-g6-f6-e6 would be a major positional mistake as it creates multiple weaknesses. Here this is not the case, as the natural arrangement of Black's pieces allows for the pawns to be defended rather easily, while keeping a variety of active plans at hand. White generally has a spatial advantage in the hedgehog, and Black's main plan is to break in the centre with ... d6-d5, or sometimes ... b6-b5. White will typically arrange his pieces to prevent such plans, while keeping the game tense and flexible. Now, let's discuss specific lines of action for each side.
White's plans :
1. Break on the queenside with c4-c5.
2. Break on the queenside with b4-b5.
3. Break on the queenside with a4-a5.
4. Pressure the d6-pawn, but only after some pieces have been traded.
Black's plans :
1. Break in the centre with ... d6-d5.
2. Break on the queenside with ... b6-b5.
3. Create a kingside attack with ... iih8, ... E:g8 and ... g7-g5-g4. Or maybe with ... h7-h5-h4-h3.
4. Prepare all the plans above without actually executing any of them until the right opportunity comes.
 White's Plans 1 -3 are often based on arranging pieces actively to subsequently open up the queenside. Such action often gives White a big advantage because Black's pieces are not as active due to their limited space. The most common of these breaks is c4-c5, which typically opens the b- and c-files. White's fourth plan is not as easy to implement because the d6-pawn is not always vulnerable. Black will usually have a bishop on e7 {or c7) which easily protects this pawn from the attack of rooks down the d-file. In addition, the breaks ... b6-b5 and ... d6-d.5 are powerful, drawing attention away from this small vulnerability. However, after some pieces are traded, Black's chances of counterplay lose strength, giving more importance to a vulnerable d6-pawn.
 If White's bishop is on the fl -a6 diagonal, Black's first plan is the most important. This plan is strong that White players will devote a great deal of energy to fight against it. In most cases White will be able to prevent this break, and Black will need a new plan to create counterplay. A popular option is to create kingside threats with the third plan. This plan often yields double-edged positions where a single slip can be very costly for either side. As we will learn in this chapter, if White cannot fight this plan with a queenside reaction, then Black's kingside play will give him an excellent position.
If White's bishop is on g2, then the ... d6-d5 break is much more difficult to carry out, but then Black's plan second plan (the ... b6-b5 break) gains strength. As long as White does not have a bishop on the fl -a6 diagonal, this break is likely to work well. Something to notice is that if White has played g2-g3 and g2, then Black's plan of ... !l:g8 and ... g7-g5-g4 does not really hit anything, hence it should not be attempted at all.
Finally, something to mention about Black's position is its flexibility. Often White will find ways to prevent or undermine Black's attempts for counterplay. In such cases, Black can often just wait and attempt new plans without damaging his position. In many cases it is better for Black to continue preparing his plans, or to start a new plan, than to execute a plan under unfavourable circumstances; this is the essence of the fourth plan.

Share:

NajdorfType II

Image result for Najdorf Type I


Just as in the previous chapter, I shall emphasize that this structure is not only typical of the Najdorf, but rather many other variations in the Sicilian, such as 1 .e4 c5 2.f3 c6 3.d4 d4 4.d4 e5 5.b5 d6. This structure is one of my favourites, as it provides a nice mix of tactical resources and strategic ideas. I grew up playing the English Attack against the Sicilian, and played this pawn structure many times. I enjoyed opposite flank attacks and most of my games took this direction for good or for bad. 1his chapter will not focus on these attacks. I will admit they are very exciting and complex, but they lack the strategic substance that constitutes the essence of this book. Instead we will focus on the strategy that hides behind the combinations. In this structure, all strategic plans are in some way connected to the control of the d5-square. As the reader can easily verify on his own, pretty much every successful attack in this position works out because such central control has been achieved. Now, let's examine how each side may fight for the d5-square:
White's plans :
I. Place a knight on d5, and have enough pieces to always be able to recapture with a piece rather than a pawn.
2. Advance g2-g4-g5 expelling Black's knight on R:l, a defender of the d5-square.
3. Play g5xf6 to eliminate the knight defending the d5-square.
4. Play f2-f4-f5 preventing Black from placing his light-squared bishop on e6.
Black's plans :
1. Break in the centre with ... d6-d5 and, by doing so, take over the initiative.
2. Press down the c-file, so that White cannot play ltJc3-d5 because of a vulnerable pawn on c2.
3. Play ... b7-b5-b4 expelling White's knight from c3 before c3-d5 can be played.
Overall, I believe chances are approximately level. If things work out well for White, he will have pleasant control of the d5-sq uare and he will be able to progress slowly, either positionally on the d-file, or tactically with a kingside pawn storm. On the other hand, if Black's strategy succeeds he will be able either to release his position with ... d6-d5, or favourably transfer into a Najdorf structure ofType I.
Variants of this structure :
Throughout this chapter we will consider two other versions of this pawn structure. The first consists of White having a pawn on c4 rather than c2. Roughly speaking, this permanently aprevents the ... d6-d5 break, but instead gives Black the possibility to attack with ... b7-b5. The second version of this pawn structure consists of White having his f-pawn on f5 instead of f3. The main difference is that such a pawn provides better chances for a kingside attack, although the e4-pawn becomes more vulnerable.
This chapter is organized around these three variants of the structure. The first two games are examples of the standard structure with the pawns on c2 and f3. The first game illustrates White's control of the d5-square while the second is an initial example of Black's central break with ... d6-d5. The next two games showcase White's c4-pawn. In the first, White gains a dominating position from the start and easily imposes his advantage, while the second is a complicated game in which Black gains enduring counterplay by breaking White's central hold with ... b7-b5. The last two games illustrate the structure with White's pawn on f5. In the first White successfully prevents the ... d6-d5 break and slowly grinds Black down, while in the second Black does manage to break in the centre with ... d6-d5 and obtains a quick and easy win.

Share:

NajdorfType I

Image result for Najdorf Type I


The structure studied in this chapter is typical of many Open Sicilians. It arises after White trades pieces on d5, and recaptures with the e-pawn. This frequently occurs in the Najdorf variation, but I should emphasize it is not limited to this variation. For example, we can obtain this structure after the sequence l.e4 c5 2.f3 c6 3.d4 d4 4.4 f6 5.c3 e5 6.b5 d6 7.d5 d5 8.d5. This structure deserves careful study as the recapture exd5 dramatically changes the character of the game. Even players of the highest level transform their position with this recapture without properly assessing their chances in the resulting position. This structure provides a natural imbalance and offers interesting chances to both sides. The main plans are:
White's plans :
1. Advance the queenside majority with b2-b4 and c2-c4-c5.
2. On some occasions, after Black has played ... f7-f5, it is also possible to place a bishop along the bl-h7 diagonal and play g2-g4 breaking up Black's structure. This plan is rare, but when it works it does so spectacularly well.
Black's plans :
1. Expand on the kingside with ... f7-f5 and develop a kingside attack.
2. Restrict or undermine White's queenside expansion with a potential ... b7-b5.
Bad bishops :
A recurring theme in these positions is the fight between White's light-squared bishop and Black's dark-squared bishop. Both of these bishops are considered bad according to classical strategic theory, as they run on the same colour as their respective most-advanced pawns (on d5 for White, e5 for Black) . As we will learn in this chapter, Black's dark-squared bishop is not bad at all, while White's bishop is often restricted and even useless in some positions. This is a rule to be remembered. General strategy books would nor teach us this rule, but we should remember it as an essential strategic element in this particular structure .
The first game in this chapter is the relatively well-known game Grischuk - Zhang Zhong from 2001, in which White carries out a powerful queenside expansion to create a winning passed pawn. Later Zhang Zhong manages to create illustrative kingside counterplay which emphasizes Black's many attacking possibilities.
The second game is an example of White's queenside expansion, followed by a strong kingside break with g2-g4. The third game is one from my own experience: a race between Black's kingside attack and White's passed central pawns. The last two games illustrate Black's plans in the fight between the bishops. The first of these examples is a positional treatment, while the second is a sharp tactical approach, both yielding convincing victories to Black.


Share:

Griinfeld Centre

Image result for Griinfeld Centre chess


The structure studied in this chapter typically arises from the Griinfeld Defence, and occasionally in the Nimzo-lndian Defence, in which case the e7-pawn will be on e6, but this does not affect the essence of the strategy. It rarely occurs with reversed colours unless White is deliberately attempting to play a Griinfeld with an extra tempo. Although there is central tension in the position presented, the most likely outcome is that pawns will be traded on d4, after which the c-file will be open, leaving White with a central pawn majority and Black with a queenside pawn majority. This will be a central theme across all positions of this type. Let's outline plans for each side:
White's plans :
1. Create a central passed pawn with d4-d5, dominate the centre, gain space.
2. Create a kingside attack, which will probably include the moves h2-h4-h5 and e4-e5 to gain control of the f6-square, which is usually weakened when Black develops his bishop on g7.
Black's plans :
1. Create a queenside passed pawn, especially after some simplifications.
2. Pressure the centre, place a rook on the d-file and find tactical resources associated with the open position.
In general White will get pretty good middlegame opportunities since he dominates the centre and has a little more space. This advantage disappears rather easily, as the position is open and Black has multiple opportunities to trade off pieces heading into a good endgame. One major factor in this position is the control of the c-file. If White controls the c-file it will be easier for him to expand, to create a passed pawn, to neutralize Black's play. Likewise, if Black controls the open file, White's central or kingside play will face many difficulties. One may say that open files are always important, which is often true. But in this position the open file is even more important than usual - it is essential.
The first three games in chis chapter will illustrate the importance of the c-file, and through these exam pies we will see how White can create a central passed pawn and win the game. In the third game it is Black who creates pressure by controlling the c-file, and eventually obtains a near-winning endgame. The last two games are devoted to the study of White attacking with the e4-e5 advance. In the first of these White's strategy proves successful, while in the second example Black manages to neutralize the threats to obtain a very superior endgame which is won with high class.
The first example in this chapter is the 17th game from the World Championship match of 1 990. This game is annotated in the Mega Database by GMs Ftacnik and Gurevich. I shall fast-forward through the opening to reach the position of interest.
Share:

Stonewall

Image result for Stonewall chess


The Stonewall structure often arises from the Dutch Defence, the Slav or the Catalan, the first being the most common. It could also occur with reversed colours, but this is relatively rare. Of all the pawn structures we study in this book, the Stonewall has one of the worst reputations. Players from a wide range of levels would say the idea of playing ... d7-d5 together with ... f7- f5 is positionally unsound. There is partial merit to this claim, as the e5-square becomes permanently vulnerable. Whether this vulnerable square actually becomes a serious weakness often determines whether Black's position is good or not. To be honest, I myself considered the Stonewall to be a relatively bad structure until I started researching it in orderto write this chapter. In fact, I originally wanted to make this chapter a manual on how to defeat this pawn structure. After a substantial amount of work I gave up on this aim, and instead decided to accept that the Stonewall is a solid system which deserves serious consideration. I hope this chapter will be enough to convince the reader that this is the case.
Then why does the Stonewall have a bad reputation?
I believe this is the effect of two types of observational bias:
I. White's wins in the Stonewall are often visually pleasing and positionally convincing. They are likely to be used as examples in strategy books. This decision unintentionally conveys the idea that the Stonewall is positionally incorrect. 2. Black's wins are often based on tactical resources of some sort, hence they can often be considered "accidental" rather than meritorious. Many players (including myself before writing this chapter) would skip those games without further study, simply thinking: "Black was just lucky, this will not happen to me."
Personally I was surprised on checking my database to realize that among IM and GM level games, White only scores about 54% with the openings presented in this chapter. This is basically a standard result, nothing special. Hence, statistically the Stonewall is slightly inferior, but no worse than many well-respected systems.
OK, that is enough defending the Stonewall, now let's discuss typical plans.
White's plans :
1. Obtaining firm control of the e5-square; placing a knight on this square.
2. Trade dark-squared bishops to further weaken Black's dark squares.
3. Expand on the queenside or open the c-file at a favourable stage and pursue an invasion down this open file.
Black's plans :
1. Create a kingside attack, but without completely losing control of the central squares.
2. I mprove the bad bishop with the manoeuvre ... .itd7-e8-h5 or sometimes ... b7-b6 followed by ... .lta6.
3. Create central tension with ... b7-b6 followed by ... c6-c5.
Before proceeding, I would like to clarify Black's plans somewhat. First, for Black's Plan 1 to succeed, the control of the central squares is essential. If White has undisputed control of the e5-square, then most of Black's attacking attempts will fail. A healthy attack for Black will keep a balance between fighting for the e5-square and advancing on the kingside. Black's Plan 2 is important and useful, but not always necessary. Black can find a good position even with his bishop on the humble d7-square. Finally, Black's Plans 1 and 3 should certainly not be combined. The point of Plan 1 is that the Stonewall creates a solid central structure, making a flank attack feasible. The attack would probably fail if the move ... c6-c5 had already been played. This chapter begins by showing one short example of White's dream position in the Stonewall, simply to illustrate everything Black should fight to avoid. The second and third games are examples of White's successful strategy, controlling the centre and keeping Black without counterplay. The last three games in the chapter illustrate Black's ideas for counterplay by showcasing Black's Plans 1, 2 and 3 in that order.
Share:

The Carlsbad Formation

Image result for The Carlsbad Formation chess


The Carlsbad, also known as the Orthodox Exchange formation, is a very well-known and thoroughly studied pawn structure. In fact, it is one of the few pawn structures which has received the attention other structures in this book deserve. The Carlsbad can be reached from many different move orders, and in some cases with reversed colours, such as in the Caro-Kann after: l .e4 c6 2.d4 d5 3.exd5 cxd5. Despite this fact, every game presented in this chapter will have White and Black playing the roles as presented in the diagram at the top of this page.
White's plans :
This position offers two main lines of attack for White:
1. Pursuing the so-called minority attack with b2-b4-b5 in order to create a queenside weakness.
2. Pushing f2-f3 and e3-e4 (or sometimes e3-e4 directly) gaining central space and creating tension.
Given any position, it is likely that only one of these plans will work well. This will depend on how the pieces are arranged, and how Black's queenside structure is set up. For example, the character of the game can change dramatically if Black's pawns are set up as a7-b6-c7 instead of the more typical a6-b7-c6. In addition, White's queenside plan is less likely to work if the lightsquared bishop has been developed on g2.
Black's plans :
1. The main plan is to place a knight on e4 and to create a kingside attack, but this is not always possible. For example, White might choose a set-up in which f2-f3 is included
2. The most common auxiliary plan is to play ... b7-b6 and ... c6-c5 in order to transpose into a hanging pawns position. Or sometimes just ... c6-c5 is played directly, hence dxc5 transposes into an isolani.
3. An important though far less common plan is to play ... b7-b5 once White has played b2-b4, in order to obtain a firm outpost for a knight placed on c4. This plan is less common because ... b7-b5 also creates a weakness - a backward c6-pawn, which could cause this plan to backfire.
The first game in this chapter illustrates how necessary it is for White to place his dark-squared bishop outside the pawn chain (say on g5 instead of d2). The second game is an ideal execution of White's minority attack, while the third is an example of Black neutralizing this plan after some precise moves. The fourth game in the chapter explains how White must react if Black's queenside is arranged as a7-b6-c7. The last two games show the consequences of White carrying out the e3-e4 break first successfully and then unsuccessfully.
Share:

Slav Formation

Related image


The Slav formation could very well also be called the Queen's Gambit Accepted formation, as it originates from Black capturing ... dxc4 in a Queen's Gambit position. This structure shares many common features with the Caro-Kann structure we studied in the previous chapter. To start, Black's pawn trade ... c4 still results in: I. White gaining better control of the centre. 2. White having more space by virtue of a pawn on the fourth rank. Similarly to the previous chapter, White has a comfortable advantage in this structure, and Black should hope to break free with a central break. Specific plans can be formulated as follows:
White's plans :
The control of the centre opens up multiple opportunities for White everywhere on the board. Similarly to the previous chapter, White has the plans:
1. Creating a kingside attack, this time with h2- h4-h5-h6 (or hxg6 if applicable) and possibly e3-e4-e5.
2. Placing knights on the strong outposts e5 and c5, controlling the centre.
3. Playing e4-e5 to fix the centre and control the d6-square (similar to c4-c5 in the previous chapter). Unlike the previous chapter, White also has the possibility of:
4. Carrying out a minority attack with a2-a4 and b2-b4-b5, in order to create a weakness on the queenside.
5. Simply gaining space with b2-b4, as well as preventing the ... c6-c5 break. This is far more likely than playing f2-f4 in the CaroKann structure, simply because f2-f4 weakens White's king somewhat.
Black's plans :
The main objective is to dispute White's centre and transform the structure. This can be achieved by:
1. Breaking in the centre with ... c6-c5, probably obtaining a symmetrical position after dxc5, or an isolani after ... c5xd4.
2 Breaking in the centre with ... e6-e5 will probably produce a 4-2 versus 3-3 pawn structure with roughly level chances.
3. Exerting pressure on the d4-pawn once e3-e4 has been played.
4. Disrupting White's centre with ... f7-f5. This is analogous to the plan ... b7-b5 in the CaroKann structure.
Similarly to the previous chapter, White's plans aim for an advantage, while most of Black's plans aim to equalize by transforming the structure. Black's Plan 3 rarely works, either because the d4-pawn can be easily defended, or because White players know when to refrain from e3-e4, exactly in order to prevent this plan. It should be noted that Black's Plan 2 is more likely to be achieved, since White can often prevent Plan 1 by placing a rook on the open c-file.

Outposts :
Black may place a knight on his d5-outpost, but this knight cannot compete with White's knights placed on the e5- and c5-squares. White can easily push e3-e4 to get rid of the knight on d5, if it is absolutely necessary. In contrast, White's knights on c5 or e5 are harder to deal with, as they are on the fifth rank, and Black cannot easily expel them. Chasing them away with ... f7-f6 and ... b7-b6 would create serious weaknesses on e6 and c6 respectively. The first example in this chapter illustrates White's attacking chances on the kingside, while the second game is an example of White's positional advantage in an endgame in which Black loses by asphyxiation. The third and fourth games are devoted to the central breaks ... c6-c5 and ... e6-e5 respectively. The last game in the chapter is a combination of Black's Plans 3 and 4. The chapter finishes with a short fragment to exemplify White's Plan 3.
Share:

Caro-Kann Formation


The Caro-Kann formation often appears in the Caro-Kann Defence, the Scandinavian, and the Queen's Gambit Declined (though with the white pawn already on c4) after White plays e3- e4 and Black captures with ... d5xe4. This pawn trade has two major consequences: (1) White gains better control of the centre. (2) White has more space by having the d-pawn on the fourth rank. This structure gives better chances to White in most cases, as Black's pieces are constrained. For this reason, Black's main task is to dispute White's central control by modifying the structure. Now let's discuss specific plans.
White's plans :
The control of the centre opens up multiple opportunities for White everywhere on the board, such as:
1. Creating a direct kingside attack. This is often accompanied by placing a knight on the e5 outpost, or targeting the weak h7-pawn with the queen and a bishop from d3.
2. Gaining space with c3-c4, h2-h4 and harmoniously placing pieces to control the centre.
3. Playing c4-c5 to restrict Black's release break ... c6-c5, and to gain control of the d6-square. If White manages to keep Black's counterplay under control, the game will be slow paced and White could even be able to combine some of these plans while Black suffers through passive defence.
Black's plans :
The main objective is to dispute White's centre and transform the structure. This can be achieved by:
1. Breaking in the centre with ... c6-c5 which usually produces a black 4-2 (kingside/ queenside) versus a white 3-3 pawn structure with roughly level chances.
2. Breaking up the centre with ... e6-e5 in order to obtain a symmetrical position after White captures with dxe5. This plan is rather unlikely to succeed as many of White's pieces control e5 from their natural squares (d4-pawn, knight on £3, rook on el, queen on e2).
3. Putting pressure on the d4-pawn once c3-c4 has been played.
4.Challenging White's control of the d5-square by playing ... b7-b5 once White has played c2-c4.

As the reader may notice, all of White's plans aim for an advantage, while Black's Plans 1 and 2 are essentially aimed at equalizing. Black's Plan 3 rarely works, as White is able to defend the d4-pawn in most positions. This is why White's position is somewhat superior. le should be noted that Black's Plan 1 is the most likely to be successfully achieved.

Outposts :
Some would say Black can place a knight on his d5 outpost to compensate for White placing a knight on e5; this is certainly not the case. It is unlikely that Black's knight on d5 will create serious threats to White's position. Additionally, White can always push c3-c4 to get rid of this knight if it is absolutely necessary. In contrast, White's knight on e5 is very strong, as it creates threats against Black's king. Black cannot easily expel this knight since ... f7-f6 seriously weakens the kingside. The first three games in this chapter illustrate how White may successfully carry out his Plans 1, 2 and 3 respectively. Then follow two games which are examples of how Black may successfully carry out the ... c6-c5 break. Finally, the sixth game in the chapter illustrates Black's plan to play ... b7-b5, though White wins the game after the c6-pawn becomes a weakness.
Share:

Introduction of Hanging Pawns


The 'hanging pawns' structure arises in many openings and is closely related to the isolani. In fact, most hanging pawns arise from an isolani position, in which Black trades his knight on d5 for White's knight on c3. Later, White is likely to advance c3-c4 yielding the position in the diagram. Similar to the previous chapter, this structure is equally likely to arise with either colour, but for the moment we will assume it is White who has the hanging pawns. In general, White has better middlegame prospects due to his control of central squares and his spatial edge. Black, on the other hand, should aim for an endgame or a simplified position in which these pawns are likely to become a liability. In particular, if these pawns become blocked by Black's pieces, then they will become a crucial weakness accounting for an essentially lost position. Now, let's discuss specific ideas for both sides.
White's plans :
1. Create a kingside attack. Most plans will include the moves e5, c2, d3, and a likely rook transfer through the third rank, say with gel -e3-h3.
2. Break in the centre with d4-d5, either to open lines for attack, or to create a powerful passed pawn on the d-file.
Black's plans :
1. Trade off pieces attempting to neutralize the attack. 2. Pressure the central pawns, block them if possible. 3. Break the hanging pawns, either with ... b6-b5 or ... e6-e5. These breaks are not easy to carry out, especially because an experienced player will try and prevent them at all costs. However, if they can be accomplished they are generally very strong, as they weaken those squares covered by the hanging pawns, and often force White to accept an isolani under very unfavorable circumstances.

As the reader will notice, many ideas are shared between this structure and the previous one, and this should not be a surprise. These structures are members of the same family in a general sense. They are both open positions in which White enjoys a pleasant spatial advantage at the cost of some structural instability. Overall, I would say the standard hanging pawns position offers level chances and a complex game with winning chances for both sides. Precise calculation is often required to carry out (or neutralize) the attack and to find the right timing for the central breaks mentioned above.

The first two games in this chapter will illustrate how White may successfully break in the centre with d4-d5. In the first example this break will create a decisive attack due to the opening of lines, while the second example will illustrate the power of a passed pawn advancing down the d-file. The third game is an illustration ofWhite's attacking potential within a modified structure which often arises from the hanging pawns. The last three games in the chapter illustrate (with reversed colours) how Black may play against the hanging pawns. The first of these games illustrates the blocking of the hanging pawns, while the last two exemplify the breaks ... e6-e5 and ... b6-b5 respectively.

x
Share:

Introduction of the Isolani


Video Series on Isolated Queen Pawns

The isolated queen's pawn - referred to here as the isolani - is an extremely important pawn structure. It arises in many opening variations; the Queen's Gambit Accepted, Slav, Tarrasch Defence, Sicilian Alapin or French Tarrasch to name a few. This structure is equally common with either colour, but for our discussion in this chapter we will assume it is White who has the isolani. Generally speaking, White has better middlegame prospects, while Black has better prospects in an endgame. Therefore, White's main aim will be to build an attack, while Black's hope will be to neutralize such an attack and simplify the position, obtaining a superior endgame. Let's discuss some specific plans:
White's plans:
1. Create a kingside attack. Most standard plans will include the moves tee5, .lig5 and the battery d3-.lic2. In some cases a piece sacrifice on the kingside is needed to break through the defence. Rooks are typically placed on e 1 and dl {or cl), and a rook transfer via the third rank is possible.
2. Break in the centre with d4-d5, trading pawns and opening lines with an overwhelming initiative {or even sacrificing a pawn with the same purpose).
Black's plans :
1. Trade pieces to win an endgame. In particular, exchange White's good bishop {the lightsquared bishop). 2 Place a knight on d5. This prevents the central break d4-d5, and controls some key squares. In an endgame a rook, bishop or even a king would be strong on this square. As we have seen, the plans in this structure are logical and easy to understand. Playing these positions, on the other hand, can be tricky. Great precision is required when calculating, and a good positional understanding is necessary in order to judge when the isolani provides good attacking chances (or other compensation) and when it is simply a weakness. The games in this chapter show all of these common plans in some form or another. The last two games illustrate an interesting rule for evaluating whether the isolani provides enough attacking chances. As we will learn, che key is whether the player who has the isolani possesses his good bishop. The chapter finishes with a short fragment explaining the power of an isolani which has advanced to the fifth rank.
Share: