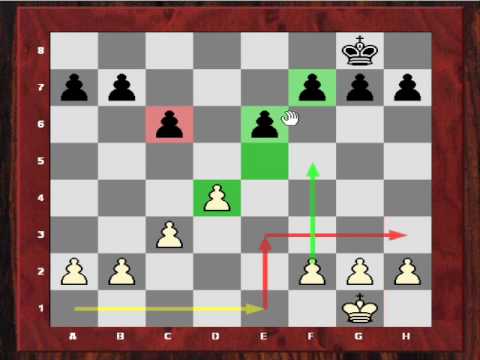
The
Carlsbad, also known as the Orthodox Exchange formation, is a very
well-known and thoroughly studied pawn structure. In fact, it is one
of the few pawn structures which has received the attention other
structures in this book deserve. The Carlsbad can be reached from
many different move orders, and in some cases with reversed colours,
such as in the Caro-Kann after: l .e4 c6 2.d4 d5 3.exd5 cxd5. Despite
this fact, every game presented in this chapter will have White and
Black playing the roles as presented in the diagram at the top of
this page.
White's
plans :
This
position offers two main lines of attack for White:
1.
Pursuing the so-called minority attack with b2-b4-b5 in order to
create a queenside weakness.
2.
Pushing f2-f3 and e3-e4 (or sometimes e3-e4 directly) gaining central
space and creating tension.
Given
any position, it is likely that only one of these plans will work
well. This will depend on how the pieces are arranged, and how
Black's queenside structure is set up. For example, the character of
the game can change dramatically if Black's pawns are set up as
a7-b6-c7 instead of the more typical a6-b7-c6. In addition, White's
queenside plan is less likely to work if the lightsquared bishop has
been developed on g2.
Black's
plans :
1.
The main plan is to place a knight on e4 and to create a kingside
attack, but this is not always possible. For example, White might
choose a set-up in which f2-f3 is included
2.
The most common auxiliary plan is to play ... b7-b6 and ... c6-c5 in
order to transpose into a hanging pawns position. Or sometimes just
... c6-c5 is played directly, hence dxc5 transposes into an isolani.
3.
An important though far less common plan is to play ... b7-b5 once
White has played b2-b4, in order to obtain a firm outpost for a
knight placed on c4. This plan is less common because ... b7-b5 also
creates a weakness - a backward c6-pawn, which could cause this plan
to backfire.
The
first game in this chapter illustrates how necessary it is for White
to place his dark-squared bishop outside the pawn chain (say on g5
instead of d2). The second game is an ideal execution of White's
minority attack, while the third is an example of Black neutralizing
this plan after some precise moves. The fourth game in the chapter
explains how White must react if Black's queenside is arranged as
a7-b6-c7. The last two games show the consequences of White carrying
out the e3-e4 break first successfully and then unsuccessfully.

0 comments:
Post a Comment