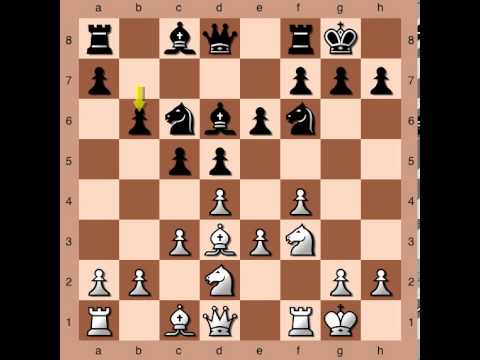
The
Stonewall structure often arises from the Dutch Defence, the Slav or
the Catalan, the first being the most common. It could also occur
with reversed colours, but this is relatively rare. Of all the pawn
structures we study in this book, the Stonewall has one of the worst
reputations. Players from a wide range of levels would say the idea
of playing ... d7-d5 together with ... f7- f5 is positionally
unsound. There is partial merit to this claim, as the e5-square
becomes permanently vulnerable. Whether this vulnerable square
actually becomes a serious weakness often determines whether Black's
position is good or not. To be honest, I myself considered the
Stonewall to be a relatively bad structure until I started
researching it in orderto write this chapter. In fact, I originally
wanted to make this chapter a manual on how to defeat this pawn
structure. After a substantial amount of work I gave up on this aim,
and instead decided to accept that the Stonewall is a solid system
which deserves serious consideration. I hope this chapter will be
enough to convince the reader that this is the case.
Then
why does the Stonewall have a bad reputation?
I
believe this is the effect of two types of observational bias:
I.
White's wins in the Stonewall are often visually pleasing and
positionally convincing. They are likely to be used as examples in
strategy books. This decision unintentionally conveys the idea that
the Stonewall is positionally incorrect. 2. Black's wins are often
based on tactical resources of some sort, hence they can often be
considered "accidental" rather than meritorious. Many
players (including myself before writing this chapter) would skip
those games without further study, simply thinking: "Black was
just lucky, this will not happen to me."
Personally
I was surprised on checking my database to realize that among IM and
GM level games, White only scores about 54% with the openings
presented in this chapter. This is basically a standard result,
nothing special. Hence, statistically the Stonewall is slightly
inferior, but no worse than many well-respected systems.
OK,
that is enough defending the Stonewall, now let's discuss typical
plans.
White's
plans :
1.
Obtaining firm control of the e5-square; placing a knight on this
square.
2.
Trade dark-squared bishops to further weaken Black's dark squares.
3.
Expand on the queenside or open the c-file at a favourable stage and
pursue an invasion down this open file.
Black's
plans :
1.
Create a kingside attack, but without completely losing control of
the central squares.
2.
I mprove the bad bishop with the manoeuvre ... .itd7-e8-h5 or
sometimes ... b7-b6 followed by ... .lta6.
3.
Create central tension with ... b7-b6 followed by ... c6-c5.
Before
proceeding, I would like to clarify Black's plans somewhat. First,
for Black's Plan 1 to succeed, the control of the central squares is
essential. If White has undisputed control of the e5-square, then
most of Black's attacking attempts will fail. A healthy attack for
Black will keep a balance between fighting for the e5-square and
advancing on the kingside. Black's Plan 2 is important and useful,
but not always necessary. Black can find a good position even with
his bishop on the humble d7-square. Finally, Black's Plans 1 and 3
should certainly not be combined. The point of Plan 1 is that the
Stonewall creates a solid central structure, making a flank attack
feasible. The attack would probably fail if the move ... c6-c5 had
already been played. This chapter begins by showing one short example
of White's dream position in the Stonewall, simply to illustrate
everything Black should fight to avoid. The second and third games
are examples of White's successful strategy, controlling the centre
and keeping Black without counterplay. The last three games in the
chapter illustrate Black's ideas for counterplay by showcasing
Black's Plans 1, 2 and 3 in that order.

0 comments:
Post a Comment